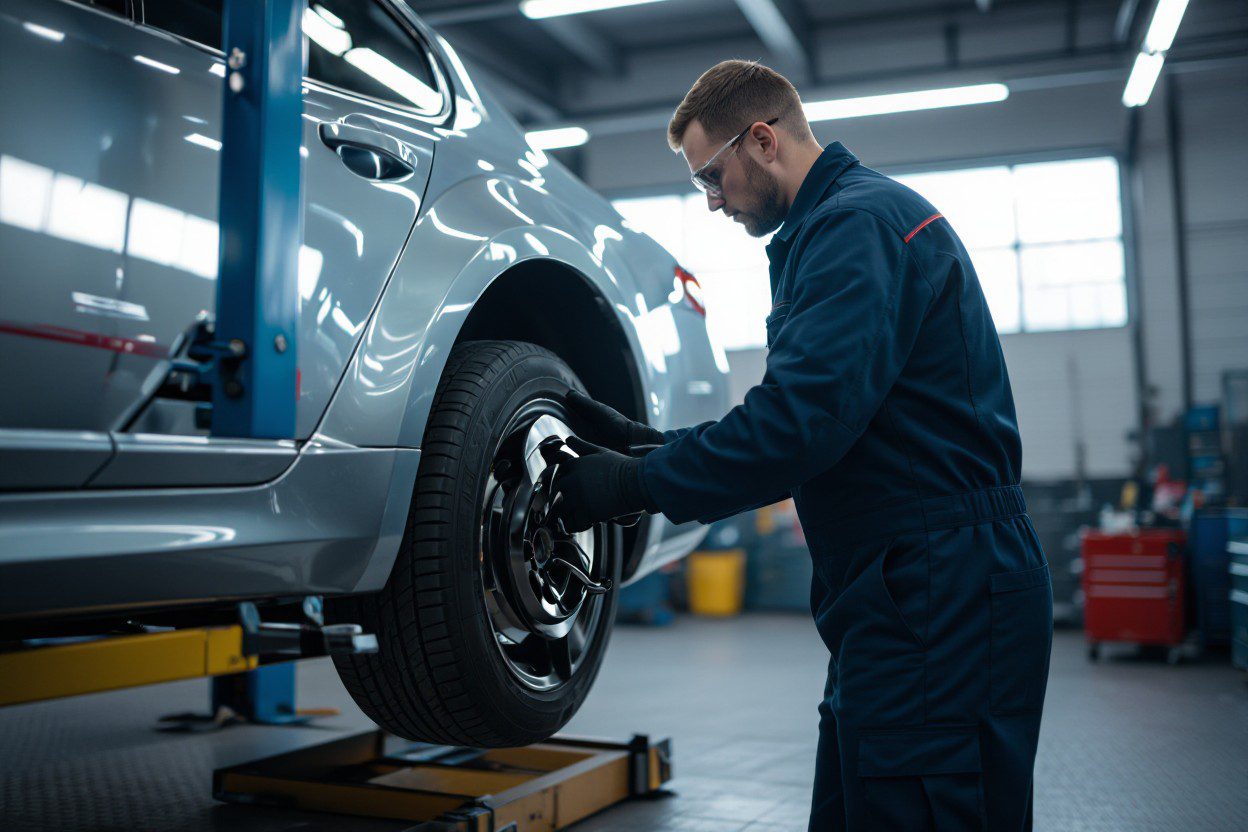
There’s a focused pre-trip safety vehicle inspection guide from Aloha Auto Repair that helps you run a long-distance trip inspection checklist and a road-ready vehicle inspection, so you can quickly assess tires, brakes, lights, fluids, battery and emergency kit and ensure your vehicle is safe, efficient, and ready for the journey.
Key Takeaways:
- Aloha Auto Repair’s pre-trip safety vehicle inspection covers fluids, brakes, tire condition and pressure, lights, wipers, battery, and emergency supplies.
- Use a long-distance trip inspection checklist to verify spare tire, jack, tool kit, coolant levels, and roadside emergency gear before departure.
- Perform a road-ready vehicle inspection that tests headlights, brake lights, turn signals, horn, windshield wipers, and the cooling system.
- Log findings, fix leaks or brake issues, and schedule service at Aloha Auto Repair for any recommended repairs.
- After maintenance, complete a brief drive and another pre-trip safety vehicle inspection to confirm all systems are road-ready.

The Road to Safety: Essential Checkpoints Before Departure — Aloha Auto Repair Pre-Trip Safety Vehicle Inspection
Follow a concise pre-trip safety vehicle inspection that doubles as your long-distance trip inspection checklist: verify lights and signals, test brakes for firmness and noise, confirm battery terminals are clean, and secure cargo and roof loads. Log tire pressures and tread, inspect belts for cracks, and keep emergency gear—jumper cables, flashlight, basic tool kit—accessible to ensure a true road-ready vehicle inspection before you head out.
Tire Condition: The Foundation of a Safe Journey
Check tread depth with a quarter—if Washington’s head is covered you have about 4/32″ or more; below 2/32″ is legally worn. Inflate tires to the PSI on your door placard (commonly 30–35 psi), scan sidewalls for bulges or cuts, and verify spare is inflated and tools are present. Uneven wear indicates alignment, suspension, or inflation issues to fix before a long-distance trip inspection checklist.
Fluid Levels: Ensuring Your Vehicle Runs Smoothly
Inspect engine oil on level ground—dipstick should read between MIN and MAX and oil should not be gritty; typical modern oil change intervals run 5,000–7,500 miles depending on use. Check coolant at the cold fill line with a 50/50 antifreeze mix, ensure brake fluid sits between min/max and is clear, and confirm transmission fluid is pinkish without burning odor. Top only with manufacturer-specified fluids during your safety vehicle inspection.
Perform fluid checks at least before each long leg and roughly every 500 miles on extended drives: check oil after the engine cools 5–10 minutes for an accurate dipstick reading, verify automatic transmission level warm with the engine running per the owner’s procedure, and note that dark brown oil or a burned transmission smell demands service. Keep a log on your long-distance trip inspection checklist to complete a thorough road-ready vehicle inspection.
The Heart of Your Engine: Key Components to Inspect — Aloha Auto Repair
Focus on the engine bay components that most often cause roadside failures during a pre-trip safety vehicle inspection: belts, hoses, fluids, and fasteners. You should check serpentine belt wear (cracks or glazing), coolant level and concentration (50/50 antifreeze), oil level and service interval, and any visible leaks or loose clamps to keep your car a reliable, road-ready vehicle inspection candidate for long hauls.
Brake System: Stopping Power You Can Trust
Inspect brake pad thickness (replace under ~3 mm), rotor runout and scoring, and brake fluid level and DOT rating—DOT 3/4 are common; swap fluid every 2 years if unknown. You can check for spongy pedal feel, ABS warning lights, and uneven pad wear that indicate caliper or guide-pin issues. Include this on your long-distance trip inspection checklist so braking performance won’t surprise you mid-route.
Battery Health: Ensuring Reliability in Extreme Conditions
Test battery resting voltage (12.6V fully charged) and note battery age—most lead-acid units decline after 3–5 years; heat accelerates failure. Look for corroded terminals, secure mounting, and proper CCA rating for your vehicle; weak batteries often fail during cold starts or when accessories draw power, so include battery checks in every pre-trip safety vehicle inspection.
Use a digital multimeter to measure resting voltage, then start the engine to confirm alternator charging between 13.7–14.7V. Perform a load or CCA test if available: cranking voltage should not fall below ~9.6V. Inspect for bulging cases, fluid levels on serviceable cells, and clean terminals—loose or corroded clamps can mimic a dead battery. A battery older than four years usually warrants replacement before a long trip to avoid roadside service calls.
Lights and Signals: Visibility and Communication on the Road
Scan headlights, high beams, turn signals, brake lights, and hazards for proper operation; replace dim or flickering bulbs and verify lens clarity to avoid reduced lumen output. Aim headlights per manufacturer specs and test turn signals and brake lights with a secondary person or reflective surface. Proper lighting completes a road-ready vehicle inspection and should be on every long-distance trip inspection checklist.
Check sockets and connectors for corrosion and test voltage at lamp sockets (~12V) if a light fails. Replace bulbs in matched pairs to maintain uniform output; swapping only one headlight often leaves uneven beam pattern. For LED retrofits confirm CAN-bus compatibility to avoid hyperflash. Inspect trailer-side connectors and fuses too—many breakdowns trace back to a blown fuse or a corroded pin, not the bulb itself.
The Inside Story: Interior Checks for Passenger Safety
Scan the cabin: seats, headrests, interior lights, HVAC vents and mirrors to confirm passenger comfort and visibility. Verify seat adjustment range, secure any loose objects that could become projectiles, and test climate controls and defoggers for proper operation. During your pre-trip safety vehicle inspection add child-seat LATCH checks and confirm cabin air filter condition; include these items on your long-distance trip inspection checklist so the vehicle meets a comprehensive vehicle safety inspection standard.
Seatbelts and Airbags: Protecting What Matters Most
Inspect seatbelt webbing for cuts, frays or glazing and run each buckle to ensure smooth engagement and an audible click; check retractors for full rewind under slight tension. Scan the dash for the SRS/AIRBAG warning—if it’s illuminated you need a diagnostic scan and likely parts replacement. Confirm airbag covers have no damage and that seat-mounted sensors and seat-position switches operate so restraint systems deploy correctly when needed.
Emergency Equipment: Preparing for the Unexpected
Keep a compact 2‑lb ABC fire extinguisher, a first-aid kit with ~25 consumables, three reflective triangles, a 200‑lumen flashlight, heavy‑gauge jumper cables (4‑gauge for most cars), and a tow strap rated to your vehicle’s GVWR. Stow items where you can access them quickly and add them to your long-distance trip inspection checklist so your road-ready vehicle inspection includes emergency readiness.
Check expiration dates and functionality regularly: inspect your extinguisher pressure gauge monthly, replace first-aid consumables older than three years, and test flashlight batteries before every long run. Carry a portable 12V inflator (60 PSI capability) and a tire plug kit for rapid temporary repairs. Use a dedicated trunk organizer so tools don’t shift; store reflective triangles to deploy at 10 ft, 100 ft and 200 ft behind the stopped vehicle on highways. Aloha Auto Repair’s recent service audits found nearly 28% of customers on long trips lacked a charged flashlight or had expired first-aid items—inspect your gear every three months and always include it in your pre-trip safety vehicle inspection.
The Bottom Line: Benefits of Routine Vehicle Inspections — Aloha Auto Repair
Routine vehicle inspections cut downtime, extend component life, and reduce the odds of unexpected breakdowns. You benefit by following a pre-trip safety vehicle inspection and long-distance trip inspection checklist that highlights tires, brakes, fluids, lights, and battery. Aloha Auto Repair’s road-ready vehicle inspection pairs those checks with diagnostic scans and documented results to keep your trips smooth and safe.
Cost Savings: The Economic Case for Preventive Maintenance
Routine checks prevent small fixes turning into big bills. Replacing worn brake pads typically runs $150–$300, while ignored pads can force rotor and caliper jobs at $400–$800; fixing a leaking coolant hose early often costs under $100 versus $1,000+ for engine overheating repairs. You save hundreds to thousands over time by using a pre-trip safety vehicle inspection or long-distance trip inspection checklist and scheduling a professional road-ready mobile safety vehicle inspection Allen TX.
Peace of Mind: The Psychological Advantage of Being Prepared
Being proactive removes uncertainty before you hit the road. You gain confidence when your pre-trip safety vehicle inspection confirms correct tire pressure, adequate tread, charged battery, and visible fluid levels; a long-distance trip inspection checklist helps you spot issues like hairline radiator leaks or a weak alternator before they strand you. Aloha Auto Repair’s road-ready vehicle inspection gives you a documented clearance so you can travel with less stress.
Checklists and receipts reduce anxiety if problems arise: presenting a completed pre-trip safety vehicle inspection speeds roadside assistance and insurance interactions. A professional road-ready vehicle inspection typically takes 15–30 minutes and includes a battery load test, tire tread depth check (replace around 4/32″ for highway use), brake inspection, fluid top-offs, and lighting checks. You should also pack an emergency kit with a spare fuse, tire pressure gauge, and basic tools to reinforce that peace of mind.
Final Words — Aloha Auto Repair Guidance
Upon reflecting, you should treat a pre-trip safety vehicle inspection as your primary defense before any journey; at Aloha Auto Repair you can follow a long-distance trip inspection checklist to verify fluids, tires, brakes, lights, and belts, completing a thorough road-ready vehicle inspection so you can travel with confidence that your vehicle will perform reliably.
FAQ
Q: What is a pre-trip safety vehicle inspection and why should I get one before a trip?
A: A pre-trip safety vehicle inspection is a systematic check of systems and components to confirm safe, reliable operation before you drive. For Aloha Auto Repair, this service targets fluids, brakes, tires, lights, battery, belts, hoses and emergency gear to reduce the risk of breakdowns and unsafe conditions on the road.
Q: How long does a typical pre-trip safety vehicle inspection take and what is included in a long-distance trip inspection checklist?
A: A standard inspection at a shop often takes 30–90 minutes depending on vehicle condition. Aloha Auto Repair can perform these items and document findings so you depart confidently.
Q: Can I perform a pre-trip safety vehicle inspection myself, or should I bring my car to Aloha Auto Repair for a road-ready vehicle inspection?
A: You can complete basic checks yourself—verify oil and coolant, inflate tires to spec, test lights, glance for leaks and pack an emergency kit. For a complete road-ready vehicle inspection, bring the vehicle to Aloha Auto Repair.
Q: How soon before departure should I schedule the inspection and what warning signs indicate my vehicle is not ready to travel?
A: Schedule the inspection 1–7 days before departure depending on trip length and vehicle age—closer for older vehicles or if you suspect problems.
Q: What common repairs are discovered during a pre-trip safety vehicle inspection and what are typical cost ranges?
A: Common findings include tires below safe tread or with punctures (replacement $100–$300 per tire), worn brake pads or rotors (pads $100–$250 axle; rotors additional), weak batteries ($80–$250), low or contaminated fluids and filters ($30–$150), failing belts or hoses ($75–$300), and alignment or suspension work ($80–$300).
Get peace of mind before your island adventure with our pre-trip safety vehicle inspection at Aloha Auto Repair. Our expert team ensures your car is road-ready, safe, and reliable, so you can focus on enjoying the journey. Schedule your inspection today and drive with confidence!
Also read:
Aloha Auto Repair — Quick Guide to Auto Oil Filters
Why Should You Book Car Diagnostics Service? The Ultimate Guide to Avoiding Costly Repairs
Vehicle Mechanic Near Me: Finding Reliable Service for Your Car


